
Optimising Patch Panel Architectures: A Guide to Reducing Latency in UK Residential Networks
As a UK-certified installer with years of experience in data cabling, I’ve observed a significant evolution in residential network demands. No longer a luxury, high-speed, low-latency connectivity is a fundamental requirement for modern households. From competitive online gaming and seamless 4K video streaming to reliable video conferencing and the ever-expanding ecosystem of smart home devices, network performance directly impacts our daily lives. While much focus is rightly placed on internet service provider (ISP) speeds and Wi-Fi capabilities, a often-overlooked yet critical component influencing network latency within the home is the patch panel architecture.
My name is Gary Pearce, and in this comprehensive guide, I aim to demystify the intricacies of patch panel design and implementation, specifically through the lens of latency reduction in UK residential networks. We’ll delve into the engineering principles, best practices, and practical considerations that empower homeowners and integrators to build robust, low-latency wired networks from the ground up, or to significantly upgrade existing installations.
Understanding Latency in Residential Networks
Before we dissect the patch panel, it’s crucial to grasp what latency truly represents and why its minimisation is paramount. Latency, often measured in milliseconds (ms), is the time delay between the initiation of a data request and the receipt of the corresponding response. In simpler terms, it’s the ’lag’ you experience. While a few milliseconds might seem negligible, accumulated delays across multiple network segments, devices, and internet hops can quickly degrade user experience.
The primary causes of latency can be categorised into:
- Propagation Delay: The time it takes for a signal to travel across a physical medium (e.g., fibre optic, copper cable). This is directly proportional to the length of the medium and inversely proportional to the signal’s velocity of propagation (Vp).
- Processing Delay: The time taken by network devices (routers, switches, NICs) to process packet headers, perform error checking, and route data.
- Queuing Delay: The time a packet waits in a buffer before being transmitted, particularly prevalent during network congestion.
- Serialization Delay: The time required to place all bits of a packet onto the transmission medium.
While factors like ISP infrastructure and local network congestion contribute significantly, our focus here is on the physical layer within your home network, specifically where propagation delay and processing delays from physical connections come into play. A properly engineered patch panel architecture can dramatically reduce these inherent physical layer latencies, offering a foundational advantage to your entire network.
The Role of Patch Panels in Network Architecture
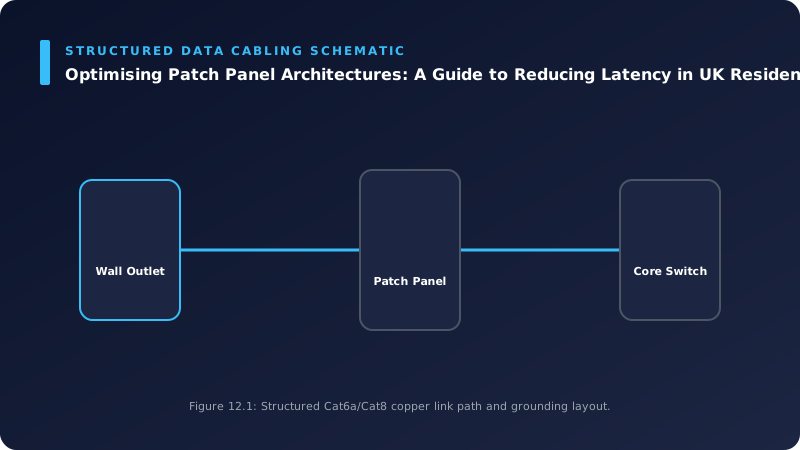
A patch panel serves as a passive, centralised termination point for multiple network cables. In a typical residential structured cabling setup, permanent horizontal runs from various rooms terminate at the patch panel, located usually in a data cabinet or utility cupboard. Short patch cords then connect these ports to network switches, routers, or other active equipment.
Primary Functions:
- Centralised Management: Provides an organised, identifiable termination point for all data cables.
- Flexibility: Allows for easy reconfiguration of network connections without re-terminating permanent cables. Need to move a device to a different switch port? Simply swap a patch cord.
- Protection: Protects the permanent cabling from wear and tear that would occur with repeated direct terminations into active equipment.
- Troubleshooting: Simplifies fault isolation by providing clear demarcation points.
While these benefits are undeniable, improper selection, installation, or design of a patch panel system can inadvertently introduce micro-latencies and signal degradation. The goal is to leverage its benefits while mitigating potential drawbacks.
Factors Contributing to Latency in Patch Panel Architectures
Every component in a network chain contributes, however infinitesimally, to the overall latency. When designing or upgrading a patch panel system, several critical factors must be meticulously considered to minimise these contributions.
1. Cable Type and Quality
The choice of permanent horizontal cabling and patch cords has a direct impact on propagation delay and signal integrity.
| Cable Category | Max Bandwidth (Typical) | Typical Vp (approx.) | Max Segment Length (Data) | Shielding Options | Typical Latency (per metre) | Notes |
|---|---|---|---|---|---|---|
| Cat5e | 1 Gbps | 0.65c - 0.68c | 100m | UTP | ~5.0 - 5.1 ns | Entry-level, generally not recommended for new installations aiming for low latency. |
| Cat6 | 1 Gbps (10 Gbps <55m) | 0.67c - 0.70c | 100m (55m for 10G) | UTP, F/UTP | ~4.8 - 5.0 ns | Good balance of performance and cost, suitable for most current residential needs. |
| Cat6a | 10 Gbps | 0.68c - 0.72c | 100m | UTP, F/UTP, S/FTP | ~4.6 - 4.9 ns | Recommended for future-proofing and optimal latency. Higher performance at full length. |
| Cat7 / Cat7a | 10 Gbps / 10 Gbps | 0.70c - 0.75c | 100m | S/FTP | ~4.4 - 4.7 ns | Less common in residential, requires GG45/TERA connectors, often overkill. |
| Cat8 | 25/40 Gbps | 0.75c - 0.80c | 30m | S/FTP | ~4.2 - 4.4 ns | Designed for data centres, not typically viable or necessary for residential. |
Note: ‘c’ represents the speed of light in a vacuum (approximately 299,792,458 m/s). Vp values are approximate and vary by manufacturer and specific cable construction.
Higher category cables typically offer higher Vp, meaning signals travel faster, thus reducing propagation delay. They also have tighter twist rates and better shielding, which reduces crosstalk and external interference, contributing to cleaner signals and fewer retransmissions (which would also add to latency). For UK residential new builds or significant upgrades, Cat6a is my professional recommendation for horizontal runs, providing a solid 10 Gigabit backbone and excellent latency performance.
2. Cable Length
This is the most straightforward contributor to propagation delay. Every metre of copper cable adds approximately 4.5 to 5 nanoseconds (ns) of latency. While individual cable runs in a home are unlikely to reach the 100m limit, the cumulative length of all cables in the path (e.g., ONT -> Router -> Patch Cord 1 -> Patch Panel -> Horizontal Run -> Wall Plate -> Patch Cord 2 -> Device) must be considered. Excessive slack or poorly planned routes introduce unnecessary length.
3. Connectors and Termination Quality
Each connection point in a network segment (the patch panel itself, wall plates, patch cords) introduces a slight delay and potential signal degradation if not terminated correctly.
- IDC (Insulation Displacement Connector) Blocks: Found on patch panels and wall plates (e.g., 110-style or Krone). Correct punching down ensures proper conductor contact and minimal untwisting of pairs.
- RJ45 Jacks: The female connector on patch panels, wall plates, and active equipment. Quality connectors ensure consistent impedance matching.
- Untwist Length: The distance over which twisted pairs are untwisted before termination should be absolutely minimal (typically <13mm for Cat6/6a). Excessive untwisting introduces impedance mismatches and crosstalk, leading to reflections and retransmissions, thereby increasing effective latency.
- Proper Seating: Conductors must be fully seated in the IDC blocks for optimal contact.
- Tooling: Using the correct, high-quality punch-down tool is critical for consistent, reliable terminations.
Poor termination can lead to significant signal reflections, requiring retransmissions, increasing bit error rate (BER), and thus dramatically impacting effective latency, even if the raw propagation delay is minimal.
4. Patch Cord Quality and Length
Patch cords connect the patch panel to active equipment and from wall plates to devices. They are often overlooked but are integral to the overall channel performance.
- Length: Use the shortest possible, appropriately rated patch cords. Don’t use a 5-meter cord when a 0.5-meter cord suffices.
- Category Matching: Patch cords should be of the same or higher category as the permanent cabling (e.g., Cat6a permanent cable requires Cat6a patch cords).
- Construction: High-quality patch cords use solid or high-strand-count stranded copper conductors, not cheaper Copper Clad Aluminium (CCA). Stranded conductors are more flexible but have slightly higher attenuation than solid. For short runs, the difference is negligible.
- Shielding: If using shielded permanent cabling, shielded patch cords and connectors are essential to maintain the integrity of the shielding system.
5. Patch Panel Design and Construction
- Shielded vs. Unshielded: If your permanent cabling is Shielded Twisted Pair (STP/FTP), your patch panel and connectors must also be shielded and properly grounded to maintain electromagnetic compatibility (EMC) and signal integrity. For Unshielded Twisted Pair (UTP) cabling, a UTP patch panel is appropriate. Mixing these types can degrade performance significantly.
- Module Type:
- Fixed Panels: Integrated RJ45 jacks and IDC blocks. Often provide better performance due to factory-controlled manufacturing.
- Keystone Panels: Use individual keystone jacks inserted into a blank panel. Offers great flexibility (e.g., mixing data with fibre, voice, or coax) but the quality of the individual keystone jacks can vary, and installation consistency is key. For absolute lowest latency in a dedicated data environment, a high-quality fixed panel is often preferred.
6. Cross-Connect vs. Interconnect Architectures
- Interconnect (Typical Residential): A direct connection from the permanent cable to the patch panel, then a patch cord to the active equipment. This is the most common and generally recommended for residential.
- Cross-Connect (Rare in Residential): Uses two patch panels – one for permanent cabling and one for active equipment – connected by patch cords. This introduces two extra connection points and an extra set of patch cords in the signal path, inevitably adding more latency and potential points of failure. Avoid this in residential settings unless there’s a specific, advanced management requirement.
Calculations and Metrics for Latency Assessment
While sophisticated cable certification tools provide precise measurements, understanding the basic calculations helps in appreciating the impact of design choices.
Propagation Delay Formula:
The time taken for a signal to travel a given length of cable can be calculated as:
Delay (ns) = Length (m) / (Vp * c)
Where:
Delayis in nanoseconds (ns).Lengthis in metres (m).Vpis the Velocity of Propagation (a dimensionless fraction of c).cis the speed of light in a vacuum (approx. 299,792,458 m/s).
Let’s use a typical Cat6a UTP cable with a Vp of 0.70c.
Vp * c = 0.70 * 299,792,458 m/s ≈ 209,854,720 m/s
So, the delay per metre is:
1 m / 209,854,720 m/s ≈ 4.76 ns/m
Example Total Latency Calculation for a Residential Link (Physical Layer Only):
Consider a common path in a UK residential setup:
ONT (Openreach Fibre Modem) -> Router -> Patch Panel -> Horizontal Cable Run -> Wall Plate -> End Device
Let’s assume:
- Router to Patch Panel: 0.5m Cat6a patch cord (solid core recommended for fixed connections).
- Patch Panel: 1 connection point (IDC block to RJ45 jack).
- Horizontal Cable Run: 20m Cat6a UTP cable.
- Wall Plate: 1 connection point (IDC block to RJ45 jack).
- Wall Plate to End Device: 1.0m Cat6a patch cord (stranded core for flexibility).
Calculations:
-
Cable Propagation Delay:
- 0.5m patch cord: 0.5m * 4.76 ns/m = 2.38 ns
- 20m horizontal run: 20m * 4.76 ns/m = 95.2 ns
- 1.0m patch cord: 1.0m * 4.76 ns/m = 4.76 ns
- Total Cable Delay: 2.38 + 95.2 + 4.76 = 102.34 ns (or 0.102 µs)
-
Connector Latency: Each RJ45 connector pair (male plug + female jack) adds a small amount of latency due to impedance changes and signal processing. While highly dependent on quality, a typical figure for a well-terminated connection is around 0.5 ns.
- Router port -> Patch Cord: ~0.5 ns
- Patch Cord -> Patch Panel (front): ~0.5 ns
- Patch Panel (rear termination): ~0.5 ns (IDC block)
- Horizontal Cable -> Wall Plate (rear termination): ~0.5 ns (IDC block)
- Wall Plate (front) -> Patch Cord: ~0.5 ns
- Patch Cord -> Device port: ~0.5 ns
- Total Connector Delay: 6 * 0.5 ns = 3.0 ns
Estimated Total Physical Layer Latency for this segment: 102.34 ns (cable) + 3.0 ns (connectors) = 105.34 ns (or approximately 0.105 microseconds).
This figure is exceedingly small, demonstrating that individual physical layer contributions are tiny. However, a poorly terminated connection might add significantly more, potentially several nanoseconds of reflections or even microseconds if retransmissions are required. The real benefit of optimisation lies in ensuring these micro-latencies are consistently minimal, reducing jitter (variation in latency) and signal errors, which have a much more noticeable impact on real-world application performance.
Best Practices for Optimising Patch Panel Architectures in UK Residential Settings
Drawing on my experience as a certified installer, these practices will form the bedrock of a high-performance residential network.
- Strategic Cable Selection: For new installations or complete rewires, standardise on Cat6a UTP for horizontal runs. This provides 10 Gigabit Ethernet capabilities up to 100 metres and robust performance for the foreseeable future. If you foresee significant external electromagnetic interference (e.g., near heavy machinery, high-power cables), consider Cat6a F/UTP (foil shielded around the whole cable) with appropriate shielded patch panels and grounding, but be aware of the increased installation complexity and cost.
- Minimise Cable Lengths:
- Equipment Placement: Plan the central location of your patch panel and active equipment (router, switch) carefully to minimise average horizontal cable lengths to rooms.
- Patch Cords: Use shortest practical length patch cords. My standard practice is to use colour-coded 0.5m, 1m, and 2m cords where appropriate. Avoid coiling excess cable; cut it to length if possible (for permanent runs).
- Excellence in Termination: This is non-negotiable for low latency and high reliability.
- Maintain Twist Rates: The cardinal rule. Untwist pairs only as much as absolutely necessary to seat them into the IDC block – ideally, no more than 13mm for Cat6/6a. The tighter the twists are maintained to the point of termination, the better the impedance matching and crosstalk performance.
- Use the Right Tools: Invest in a high-quality punch-down tool with the correct blade type (110 or Krone, matching your panel/jack). Ensure it’s correctly calibrated to cut excess wire precisely without damaging the conductor.
- Consistent Standard: Terminate all cables to either TIA/EIA 568A or 568B standard, and crucially, maintain this consistently across all connections (patch panel, wall plates). 568B is more common in commercial and residential UK installations.
- Verify Contact: Ensure all conductors are fully seated and making proper contact.
- Strain Relief: Ensure cables are properly secured with cable ties before termination to prevent accidental pull-outs and reduce strain on the IDC blocks.
- Patch Panel Quality and Type:
- Choose a high-quality, robust patch panel from a reputable manufacturer. For Cat6a installations, ensure the panel is also Cat6a rated.
- If using shielded cabling (F/UTP, S/FTP), ensure the patch panel is also shielded and properly bonded to a common earthing point to maintain the shield’s integrity. An ungrounded shield is worse than no shield.
- Documentation and Labelling:
- While not directly impacting latency, thorough documentation and clear, consistent labelling of every port (both on the patch panel and corresponding wall plates) is critical. It simplifies troubleshooting, reduces downtime, and prevents incorrect reconnections, which can otherwise lead to perceived latency issues.
- Use a consistent numbering scheme (e.g., PP-01, PP-02 correlating to Room1-Socket1, Room1-Socket2).
- Environmental Considerations: While less of an issue indoors, protect your data cabinet from extreme temperature fluctuations and humidity. While they don’t directly cause latency, they can degrade cable performance and longevity, leading to intermittent issues.
Step-by-Step Guide: Upgrading a Residential Patch Panel for Optimal Latency
For existing homes, upgrading the patch panel architecture can yield significant benefits. Here’s a professional approach:
- Comprehensive Assessment:
- Current Infrastructure: Document existing cable types (often Cat5e in older installations), lengths, and termination quality.
- Network Demands: Identify high-bandwidth, low-latency applications (gaming, 4K streaming, home server, WFH).
- Location Analysis: Evaluate the current patch panel location for optimal centralisation, accessibility, and environmental conditions.
- Detailed Planning and Design:
- Diagram Existing/Proposed: Sketch out your network topology, noting desired new cable runs, locations of wall plates, and active equipment.
- Component Specification: Select suitable high-performance components:
- New Patch Panel: Cat6a rated, appropriate port count (allow for future expansion). Consider fixed vs. keystone based on flexibility needs and quality preferences.
- Cabling: Cat6a UTP for new runs.
- Connectors: Cat6a rated RJ45 keystone jacks for wall plates.
- Patch Cords: High-quality, matched category (Cat6a), various short lengths.
- Tools: High-quality punch-down tool, cable stripper, cable cutter, continuity tester, cable certifier (if available/rented).
- Procurement of High-Quality Components: Source all cabling, patch panels, wall plates, and connectors from reputable manufacturers. Avoid unknown brands, especially for performance-critical components.
- Preparation:
- Power Down: Disconnect power to all network equipment to prevent accidental damage.
- Labelling: Meticulously label every existing cable before de-termination. Use temporary labels and then permanent ones for the new setup. Photographs can be invaluable.
- De-termination (If Upgrading Existing Cables):
- Carefully remove existing cables from the old patch panel. Inspect the permanent cable ends for damage; trim back if necessary to expose fresh conductors.
- Installation of New Patch Panel:
- Mounting: Securely mount the new patch panel within your data cabinet or wall enclosure. Ensure adequate space for cable management.
- Earthing: If using a shielded system, ensure the patch panel’s earthing stud is properly connected to a reliable earth point (e.g., building earth bar or dedicated data cabinet earth).
- Re-termination of Permanent Cables:
- Bring each permanent cable to the rear of the patch panel.
- Strip the outer jacket precisely.
- Adhere strictly to TIA/EIA 568B (or 568A, if consistently used) colour code.
- Crucially, minimise untwist length for each pair.
- Punch down each conductor firmly and cleanly using the appropriate tool. Trim excess wire automatically with the punch tool’s cutting blade.
- Repeat this process for every horizontal run terminating at the patch panel and at the corresponding wall plates in each room.
- Patch Cord Management:
- Connect active equipment (switches, routers) to the patch panel using the shortest necessary, high-quality patch cords.
- Utilise horizontal and vertical cable management accessories (e.g., cable trays, D-rings, velcro ties) to maintain neatness, airflow, and reduce strain on connectors. Colour-coding patch cords can aid in quick identification (e.g., red for WAN, blue for LAN, yellow for APs).
- Testing and Certification:
- Continuity Testing: Use a basic cable tester to verify correct wire map and continuity for every terminated link.
- Advanced Certification (Recommended for Professionals): For absolute confidence, a professional cable certifier (e.g., Fluke DSX CableAnalyzer series) can perform tests for insertion loss, return loss, near-end crosstalk (NEXT), far-end crosstalk (FEXT), propagation delay, and delay skew. These are the definitive measures of physical layer performance and directly correlate to latency and bandwidth capacity. While expensive for individual homeowners, a certified installer (such as myself) will have access to such equipment.
- Documentation Update:
- Update your network diagrams.
- Record which permanent cable connects to which patch panel port and room outlet.
- Keep records of any test results. This greatly assists in future troubleshooting and upgrades.
Conclusion
Optimising your patch panel architecture is a foundational step towards building a truly high-performance, low-latency residential network in the UK. By meticulously selecting appropriate cable categories, ensuring exemplary termination quality, managing cable lengths, and adhering to professional installation standards, you significantly reduce the physical layer contributions to network latency. The cumulative effect is a more stable, responsive, and future-proof network experience, essential for the ever-increasing demands of modern digital living.
While the intricacies can seem daunting, a well-executed patch panel installation pays dividends in performance, reliability, and ease of management. For those seeking expert guidance or professional installation to ensure your residential network meets the highest standards, please consult my online contact page. Investing in a properly engineered cabling infrastructure is an investment in your home’s digital future.
Frequently Asked Questions (FAQ)
Q1: Is a patch panel truly necessary for a small home network? Can’t I just plug cables directly into my switch? A1: While you can plug cables directly into your switch, a patch panel offers significant long-term benefits even for smaller networks. It centralises and organises your cabling, provides flexibility for reconfigurations, and protects your more expensive active equipment (like your switch) from wear and tear on its ports. For latency, a well-installed patch panel introduces negligible additional delay compared to direct termination, and its organisational benefits often lead to more efficient troubleshooting, which effectively reduces perceived downtime.
Q2: What’s the practical difference in latency between Cat6 and Cat6a for a typical residential run? A2: The difference in raw propagation delay per metre between Cat6 and Cat6a is typically very small, often less than 0.5 nanoseconds per metre. For a 20-metre run, this would be less than 10 nanoseconds total, which is imperceptible to human users. The more significant advantage of Cat6a for latency-sensitive applications comes from its superior performance against crosstalk and alien crosstalk (interference from adjacent cables), especially in a multi-cable environment. This leads to a cleaner signal, fewer retransmissions, and thus a more consistently low and stable latency, particularly for 10 Gigabit Ethernet applications over longer distances (up to 100m).
Q3: Should I use shielded (STP/F/UTP) or unshielded (UTP) patch panels and cables in my home? A3: For most UK residential environments, Unshielded Twisted Pair (UTP) Cat6 or Cat6a cabling and patch panels are perfectly adequate and often easier to install. UTP is less expensive and does not require grounding. Shielded cabling (STP, F/UTP, S/FTP) is primarily beneficial in environments with high levels of electromagnetic interference (EMI), such as industrial settings or where cables run very close to high-power electrical lines, motors, or fluorescent lighting ballasts. If you opt for shielded cabling, it’s critical to use shielded patch panels, connectors, and ensure a proper, continuous earthing system, as an improperly grounded shield can actually attract noise, making performance worse.
Q4: How can I verify the quality of my patch panel installation without expensive professional tools? A4: While a professional cable certifier (like a Fluke DSX) provides definitive performance metrics, several basic steps can help:
- Visual Inspection: Check all terminations for minimal untwist, proper conductor seating, and clean cuts. Ensure labelling is clear.
- Continuity Tester: Use a basic, affordable cable tester to verify that each wire pair is correctly terminated (T568A/B) and has continuity from the patch panel to the wall plate.
- Network Performance Monitoring: After connecting your network devices, monitor your network’s latency (e.g., using
pingcommands to your router or local server) and bandwidth (using speed test tools) both locally and to the internet. Look for consistent results and low jitter. While not scientific, consistent high performance indicates a good physical layer. - Error Checking: Check your switch or router’s interface statistics for any high numbers of packet errors, CRC errors, or dropped packets on the relevant ports. These can indicate poor physical layer connections.
📊 Technical System Design Reference Infographic
Related Technical Resource: Perimeter Intrusion Detection: Integrating AI-Powered Analytics with UK NVR Deployments
Technical Standards and Industry Resources
- External Compliance Guidance: Industry Standards & Compliance Resources
- Partner Site Feed: Gary Pearce Portfolio Services - LiveJournal